

Building your electrical enclosure should not be hard as long as you understand the finer details you require.
These aspects range from the type of enclosure to the materials and packaging of your electrical enclosure.
To simplify the fabrication process of an electrical enclosure, we have compiled a step-by-step guide to help you understand.
Have a look.

Electrical Enclosure
- Step 1: Know The Type Of Electrical Enclosure You Need
- Step 2: Be Clear On Dimensions And Size Of Electrical Enclosure
- Step 3: Design Electrical Enclosure Using Appropriate Software
- Step 4: Choose Suitable Material For Electrical Enclosure
- Step 5: Fabricate Or Machine Material Depending On Dimensions
- Step 6: Assemble Parts To Make Electrical Enclosure
- Step 7: Incorporate Appropriate Electrical Enclosure Accessories
- Step 8: Apply Suitable Surface Finish For Electrical Enclosure
- Step 9: Label Electrical Enclosure Appropriately
- Step 10: Test Electrical Enclosure For Quality Compliance
- Step 11: Package Electrical Enclosure Ready For Shipping
Step 1: Know The Type Of Electrical Enclosure You Need
Electrical enclosures are different sizes, types, and functions in different applications. Understanding which type fits your application is the right step in building your electrical enclosure.
The two main categories of electrical enclosures that you need to understand are:
The Function Of An Electrical Enclosure
Electrical enclosures serve different purposes and are available in different dimensions. For instance, we have those electrical enclosures that act as a current control room for your application.
Other types act as storage for the various electrical components. The function of your electrical enclosure has a bearing on its design and manufacturing process.
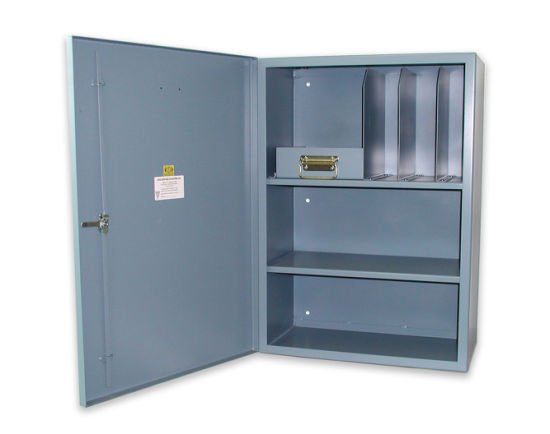
An Electronic Enclosure For Storage
Where You Intend To Install An Electrical Enclosure
You have two main types of electrical enclosure based on where to install them. That is an outdoor and indoor electrical enclosure.
Understanding these two types helps you know how to fabricate your electrical enclosure. This is because they have different material requirements, and their design differs.
For instance, the material for the fabrication of an electrical enclosure needs to withstand harsh environmental conditions.
Outdoor enclosure materials are mainly metals like stainless steel and aluminum.
Indoor enclosure materials are mainly fiberglass and plastics. The suitable material is critical for the durability of your electrical enclosure.
The design of your enclosure also changes depending on the installation location. Outdoor electrical enclosures tend to be tall and are free-standing.
Indoor electrical enclosures usually have a mounting option or are free-standing.
Understanding the variation of material and design requirements helps design correctly and build your electrical enclosure.
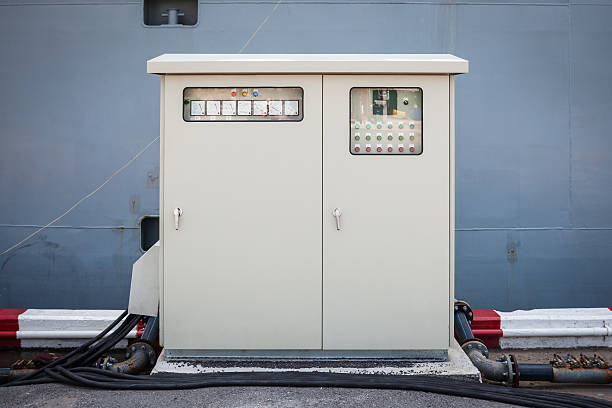
An Indoor Electronic Enclosure
Step 2: Be Clear On Dimensions And Size Of Electrical Enclosure
Electrical enclosures are available in different sizes and dimensions. Specifying the right size is a critical stage in manufacturing your electrical enclosure.
The right size and dimensions help get the correct cost in terms of raw materials. You also get to understand how to cut and assemble these parts.
Step 3: Design Electrical Enclosure Using Appropriate Software
Before deciding which electrical enclosure to build, you need to design. This is usually a soft copy of the idea you want for your enclosure.2
You can incorporate various ideas as long as they adhere to the quality standards. When making the design, you can use a particular software like AutoCAD software.
The advantage of using such software is it reduces the overall cost of making your electrical enclosure. An AutoCAD software facilitates the testing and viability of your enclosure before actual fabrication begins.
You have to consider several aspects when making your electrical enclosure. For instance, you have to consider the enclosure’s height and the components you want to install on the enclosure.
You also have to consider the opening and closing mechanisms of the enclosure. Another vital consideration is the bending angles of the various parts of your enclosure.
These angles are critical in ensuring you have the perfect design for your enclosure. When designing your enclosure, you can include other aspects, including surface finishes.
A perfect design can give you a cost estimate before fabrication. This is critical in getting the resources you may need when manufacturing your electrical enclosure.
Step 4: Choose Suitable Material For Electrical Enclosure
There are different materials that you can use in fabricating your electrical enclosure. Each of these materials has different properties that make them ideal for constructing your electrical enclosure.
Common materials for your electrical enclosure are:
Metal Material For An Electrical Enclosure
You have different metals for your selection to fabricate an electrical enclosure. The common ones are carbon steel, aluminum, and stainless steel.
The advantage of choosing carbon steel is its cost-effectiveness. This is in terms of purchasing the material and working on it.
It is an ideal metal to use if you fabricate an enclosure for use in adverse conditions. This is due to its color and ability to withstand high temperatures.
The main limitation of carbon steel is its high corrosive effect. You, therefore, have to carry out regular maintenance to prevent corrosion.
You can also apply a surface finish to prevent corrosion. Galvanization is also an alternative solution to preventing corrosion.
Another metal for your selection is stainless steel. The advantage you have with this metal is its strength and durability.
Steel is corrosion and heat resistant, making it ideal for adverse conditions. It is a common material in manufacturing enclosures for the food, pharmaceutical, and beverage industries.
Aluminum is another alternative metal in the fabrication of electrical enclosures. It is an ideal material to use in high-temperature applications.
It is a cost-effective method when you want to build your electrical enclosure.
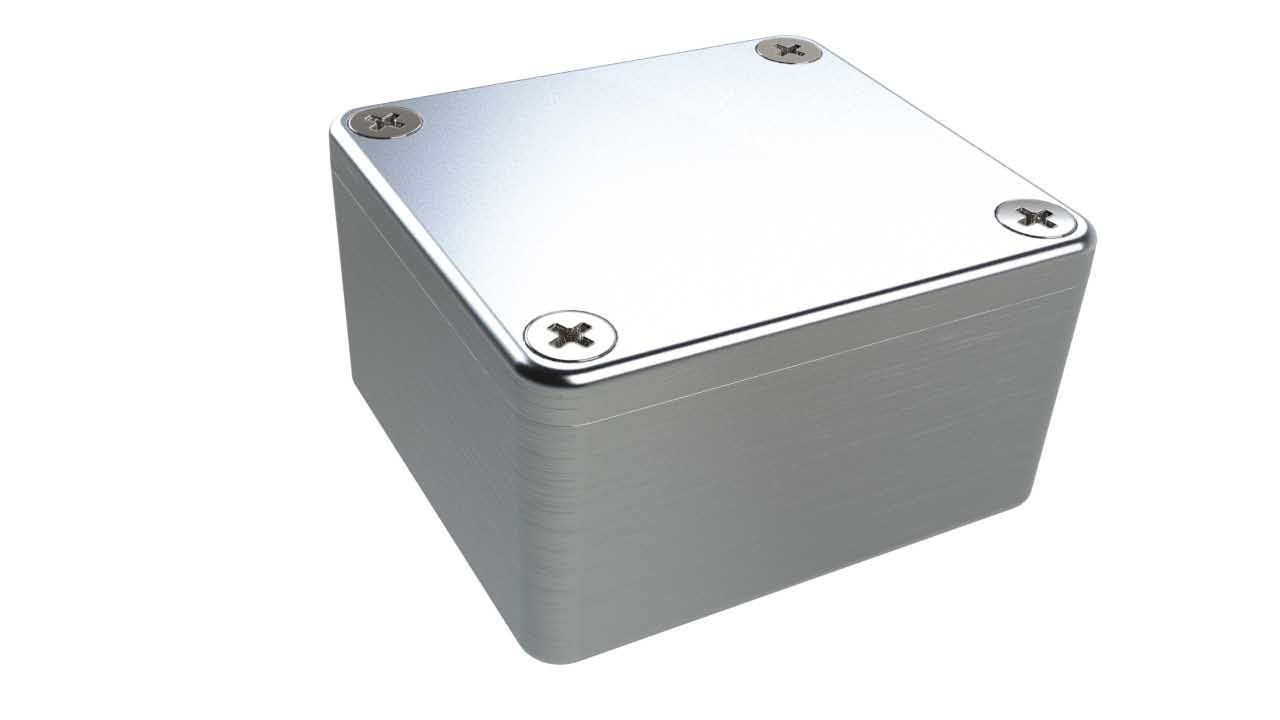
Aluminum Is An Effective Choice As It Can Be Used In High Temperature Applications
Plastic Material For An Electrical Enclosure
The main advantage of using plastic material to fabricate your electrical enclosure is its cost-effectiveness. It is relatively cheaper in terms of purchasing and machining plastic.
Plastic does not easily corrode or is easily affected by an external environment. This makes it an ideal option, especially in areas experiencing high erosion rates, like in a salty environment.
UV lights and prolonged exposure to weather are the main limitations to the use of plastic since it affects its quality. This results in high maintenance costs since you have to replace or repair your enclosure frequently.

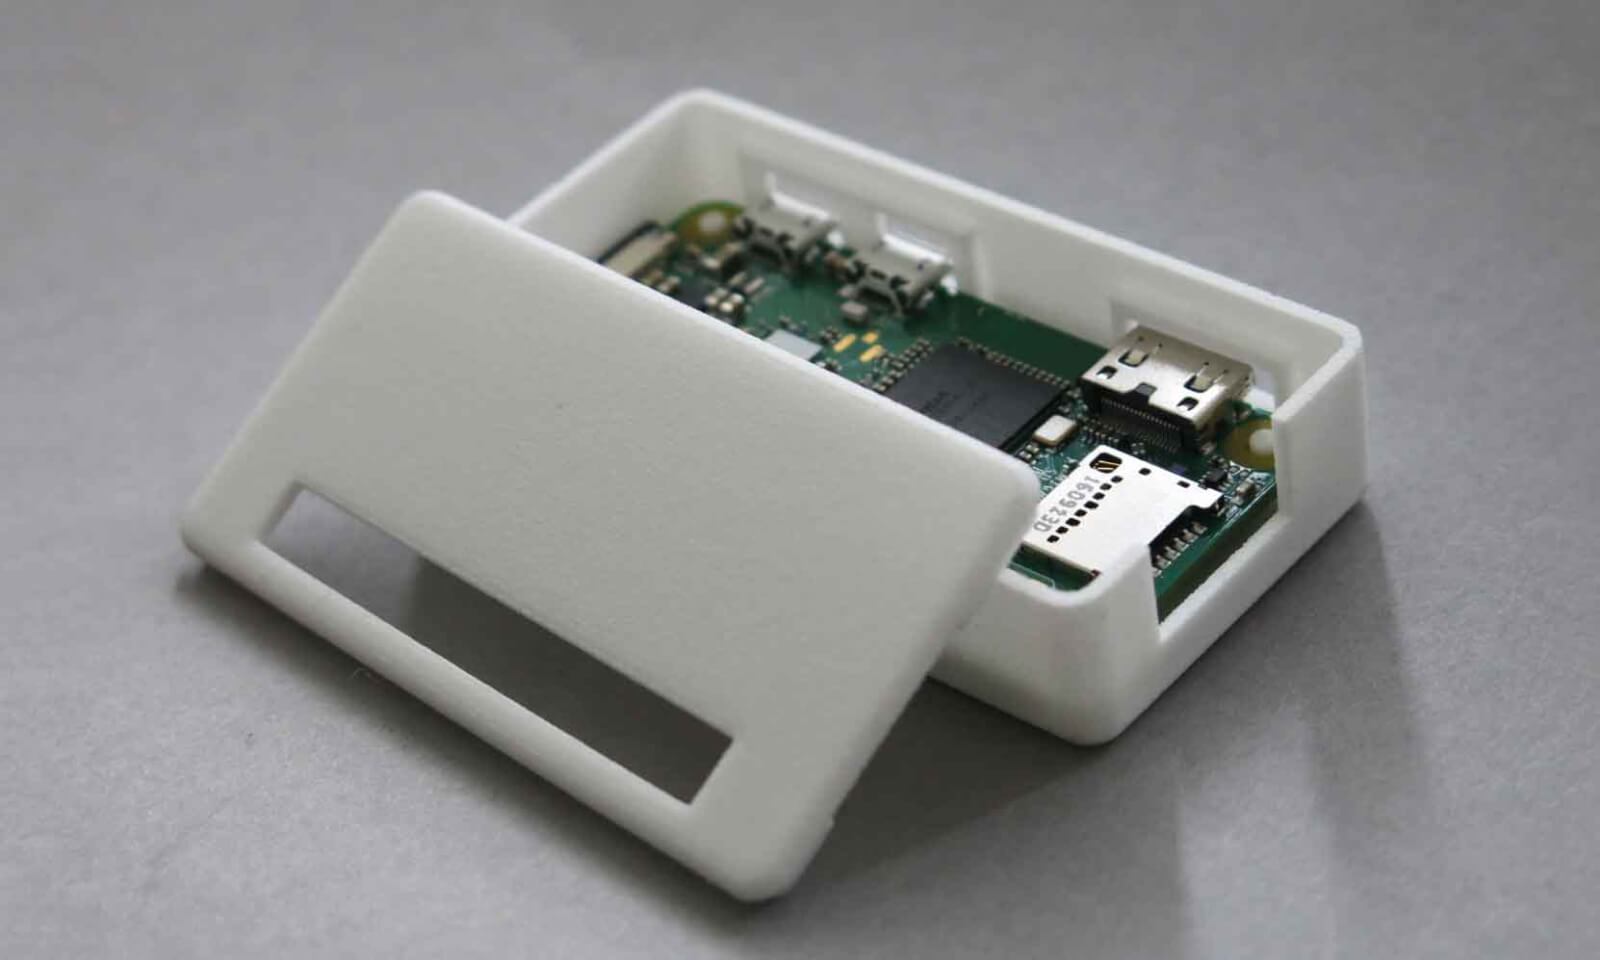
A Black Plastic Electronic Enclosure
Fiberglass Material For An Electrical Enclosure
The choice of a fiberglass material minimizes oxidation and corrosion of your electrical enclosure. It is a strong material that does not easily break in adverse conditions.
You, however, have to replace and maintain the electrical enclosure frequently. This is due to its ease of disintegration due to exposure to sunlight.
It is vital to consider several aspects before deciding which material to use in making your electrical enclosure. These aspects include cost, environment, security, and components of your electrical enclosure.
Weatherproof Fiberglass Enclosure
Step 5: Fabricate Or Machine Material Depending On Dimensions
It is essential to understand how to machine the material before manufacturing your electrical enclosure. Proper machining reduces wastage and maximizes the available resources.
The different aspects of machining that you should consider are:
Cutting Materials For An Electrical Enclosure
Most materials come in the form of sheets that you have to cut to get the necessary pieces for building your electrical enclosure. You have to take measurements for the various pieces before cutting the material.
You have different cutting techniques for cutting your electrical enclosure material. The choice of which technique to use depends on the cost and type of material you are cutting.
Main cutting techniques are using a hole saw, drilling and boring, punching, Shearing, and blanking.
Other cutting methods are waterjet, laser, and plasma cutting and routing. In some instances, you have to use a combination of methods.
Bending Materials For An Electrical Enclosure
After cutting, you have to bend the material pieces to get the perfect shape for your enclosure. The critical thing here is the bending angle for these materials.
The different bending techniques require an understanding of the design of your electrical enclosure. This includes checking on the various shapes and angles for your enclosure.
Standard bending methods are channel, offset, edge, and U and V are bending. Remember to allow when bending to avoid getting inappropriate sizes of your material.
Step 6: Assemble Parts To Make Electrical Enclosure
When you have the different material parts and machined them as per the specifications, the next step is to assemble them. This is the delicate part of building your electrical enclosure since you have to join the suitable material properly.
The main ways you can assemble your electrical enclosure are:
Joining
Joining helps in getting the ideal appearance of your electrical enclosure. It is a temporary technique that allows you to readjust the parts if needed quickly.
Standard joining techniques are bolting, caulking, shrink fitting, riveting and folding.
Welding
Welding is a permanent process that involves melting a filler and filling along the spaces of two material parts. It is a common method when using metal parts.
There are different methods of welding your metal parts. The choice of which method to use depends on various factors, such as the joint cost of welding.
Main welding methods are arc, laser, seam, electron beam, explosion, spot welding, friction welding, and cold pressure welding.
Other techniques are ultrasonic, projection, and upset welding.
Grinding
Grinding is the process of smoothening the edges of your electrical enclosure using a grinding machine. The roughness is mainly due to the welding and joining of the different parts of your enclosure.
The main types of grinding to use are surface grinding and wet grinding.
Hole Punching
Hole punching helps in creating a pathway for the laying of your cables. Hole punching also helps install various enclosure components like switches and fans.
There are different punching mechanisms you can use depending on various factors like the type and size of the hole. Common hole punching methods include piercing, slitting, nibbling, dinking, and slotting.
Piercing involves punching a small hole from on your enclosure. Such holes can serve the ventilation purpose if they are many and concentrated on one part.
Adhesive Joining
This is the best method to use when using plastic and fiberglass materials. There are different adhesives that you can use to join the different parts of your electrical enclosure.
Such adhesives range from epoxy, silicone, epoxy, and polyurethane. The main limitation to the use of an adhesive is its durability.
Adhesives lose their strength over time hence tend to form weak joints. If you are to use adhesives, then you should expect a high maintenance cost due to the need to replace the adhesives.

Welding Is An Option During Assembly Of The Electrical Enclosures
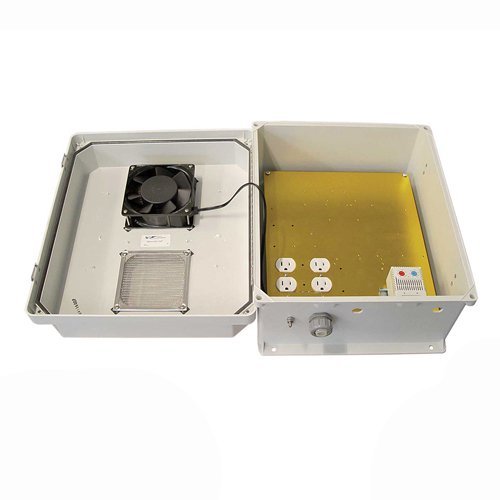
Step 7: Incorporate Appropriate Electrical Enclosure Accessories
Among the accessories that you can incorporate on your electrical enclosure are:
Temperature Management Systems
Maintaining the temperature of your electrical enclosure, especially during operation, is vital. This is because the components of your electrical enclosure release heat which can be dangerous if you don’t regulate.
There are different temperature management systems available for your selection. The choice of which one to use depends on factors like the size of your electrical enclosure.
Temperature management systems can range from simple vents and louvers to the installation of fans. The best way to choose an ideal temperature management system is to understand the heat that the components emit as they function.
Security Control System
The security of your electrical enclosure is paramount if you are to maintain its credibility. In some enclosures, minimal interference means you have to fabricate another enclosure.
Security control systems vary depending on the level of security you want or your enclosure. You can install CCTV cameras if you have a large electrical enclosure.
You can also lock your electrical enclosure using secure locking mechanisms. The essence of securing your enclosure is to ensure there is smooth functioning.
Before selecting an ideal security control system, you have to consider the type and location of your electrical enclosure.
Cable Management Systems
Cable management systems are accessories that are in place to facilitate the efficient functioning of your enclosure. This is by preventing interruptions on the cables, affecting its efficient functioning.
Cable management systems also help reduce accidents to those operating your enclosure, especially in large enclosures. You have different cable management systems for your selection.
Among the factors to consider when selecting an appropriate cable management system is the size of your enclosure. Large electrical enclosures require a more complex cable management system than small ones.
Standard cable management systems are cable runways, cable trays, bridle rings, wire baskets, wire ways, and center rails.
Step 8: Apply Suitable Surface Finish For Electrical Enclosure
The surface finish enhances the visual appeal of your electrical enclosure while protecting it. common surface finishes for your enclosure are:
Surface Coating Electrical Enclosure
There are two methods of coating your electrical enclosure. That is powder and wet paint coating.
Powder coating is the best option, especially on metals, due to its corrosion resistance and durability. It is also resistant to UV radiations which enhances the appearance and durability of your enclosure.
Wet painting is ideal for plastic and fiberglass electrical enclosures. However, wet paint peels over time, reducing the visual appeal of your enclosure.
The advantage of coating has different colors on a single electrical enclosure. The coating is available in different technologies, which enhances the strength of your enclosure.
For instance, you have UV coats that protect the electrical enclosure. You also have waterproof coats which protect the enclosure against water ingress.

A Powder Coated Electronic Enclosure
Surface Printing Or engraving Electrical Enclosure
Engraving involves curving out symbols or pictures on the surface of your electrical enclosure. Printing involves placing images or letters on your electrical enclosure.
Engraving is a durable process that assures you quality images on your enclosure. When engraving, you have to apply a polish to enhance its visual appeal.
The limitation of engraving is its relatively high cost. There are several printing techniques that you can apply to your enclosure.
They include screen and pad printing. Screen printing is easier to use compared to pad printing.
This is because you can apply different colors to your enclosure using screen printing.
Surface Plating Electrical Enclosure
You have three different types of surface plating that you can apply to your electrical enclosure. That is immersion plating, electroplating, and electroless plating.
Step 9: Label Electrical Enclosure Appropriately
Once you have built your electrical enclosure, you have to label your electrical enclosure properly. Proper electrical enclosure labeling facilitates its functioning while preventing any risks from occurring.
Different labels have different purposes on your electrical enclosure. For instance, some labels describe the entrance of authorized personnel to specific sections of your electrical enclosure.
Such labels help in protecting your electrical enclosure and its components. You need to place such labels at the entrance of your enclosure or on the specific parts that you are restricting.
You can also have labels that describe the procedure to follow when operating your electrical enclosure. These labels prevent your electrical enclosure from malfunctioning and ways of troubleshooting it.
You can place description messages on a place visible to all those who want to operate your enclosure.
Danger labels are the ones that warn you of the hazardous situation of your electrical enclosure. These labels are vital in minimizing the hazards when operating certain sections of your enclosure.
Labels come in different sizes and colors. Warning and restricting labels are usually red. This is for ease of visibility.
Step 10: Test Electrical Enclosure For Quality Compliance
You have to subject your electrical enclosure to various quality standards to ensure it fits usage. Such tests include:
Thermal Shock Testing
The aim of performing this test is to understand the durability of the electrical components in your enclosure. It helps to understand how the different components react under variations of temperature.
Accelerated Aging Testing
This test considers all the aspects that can reduce the reliability and durability of your electrical enclosure. Conducting this test involves subjecting your enclosure to an environment that reduces its durability.
Humidity Testing
Humidity testing is critical in understanding the impact of humidity on your electrical enclosure. This is essential, especially if you install your electrical enclosure in humid conditions.
Temperature Variation Testing
This test aims to determine the characteristics of the components of your enclosure when there is a sudden temperature change.
It facilitates the material selection and the operating temperature of your electrical enclosure.
- Ingress Protection Testing
IP testing aims to determine the level of protection of your enclosure against water or dust penetration. This guarantees the functionality and
Step 11: Package Electrical Enclosure Ready For Shipping
The last step in manufacturing your electrical enclosure is the packaging process. Proper packaging protects your enclosure from various external factors.
This ensures your electrical enclosure reaches its final consumer in a suitable condition and shape. The choice of which packaging material depends on the size of your electrical enclosure.
The use of cardboards is common with smaller electrical enclosures. This is because You can adequately fit the enclosure on the cardboard and seal it.
When using cardboards, you must include spaces around them. This minimizes damage and ensures the enclosure remains fixed during the shipping process.
Wooden or plastic pellets are ideal for packaging medium-sized electrical enclosures. When using pellets, you must seal the enclosure properly.
This reduces vibrations and movements to the enclosure, which can damage it.
If you manufacture large or extraordinary electrical enclosures, then packaging such becomes a challenge. The solution to this is to package the parts separately and assemble them at the final point of usage.
Depending on their sizes, you can package the different parts using either cardboard or pellets.
Other Useful Resources:
Making Custom Electrical Enclosure
Electrical Enclosure Manufacturing Process
For any questions or inquiry about how to build electrical enclosures, contact us now.