

ジャンクションボックスを適切に設置することで、電気安全性を向上させ、電気工事規定を遵守することができます。この記事では、電気工事業者や施設管理者向けに、工具の選定から詳細な設置手順まで、実践的な設置ガイドラインを提供し、すべての作業を安全に完了できるよう支援します。.
電気接続箱とは何ですか?
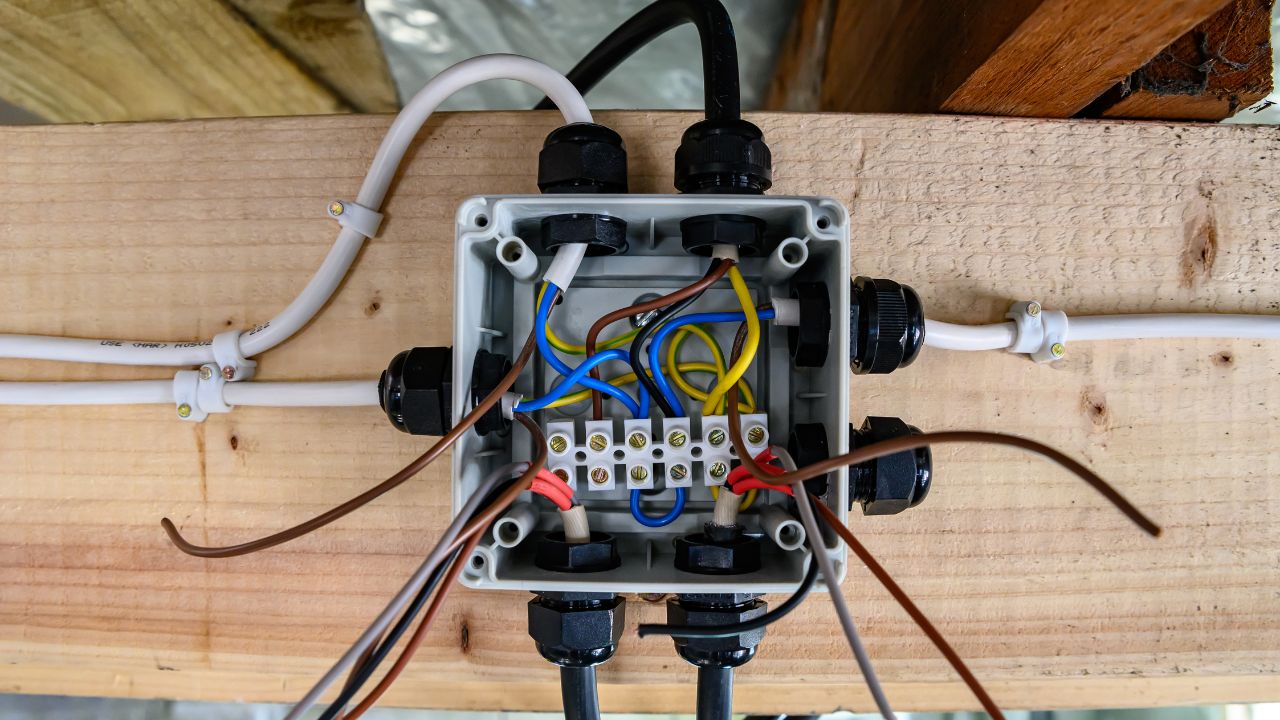
あ ジャンクションボックス ジャンクションボックスは、電線を保護するための筐体です。プラスチック製または金属製のカバー付きジャンクションボックスを選び、コネクタを筐体内に収納します。ジャンクションボックスは通常、壁、天井、屋根裏など、アクセスしやすい場所に設置され、複数の回路への接続や分岐に使用されます。.
準備:必要な道具と材料
インストール前に、より効率的なワークフローを構築し、インストールのセキュリティを確保するために必要なツールを準備してください。必要なツールは以下のとおりです。
| ツール | ドライバー(マイナスとプラス)、ペンチ、ワイヤーストリッパー、電圧テスター、ドリルとドリルビット、カッターナイフ、メジャー |
| 材料 | ジャンクションボックス、ワイヤナット(コネクタ)、ケーブルクランプ、電線(同色)、取付ネジ、カバープレート |
手順ガイド:ジャンクションボックスの取り付け方法
適切な接続ボックスを準備する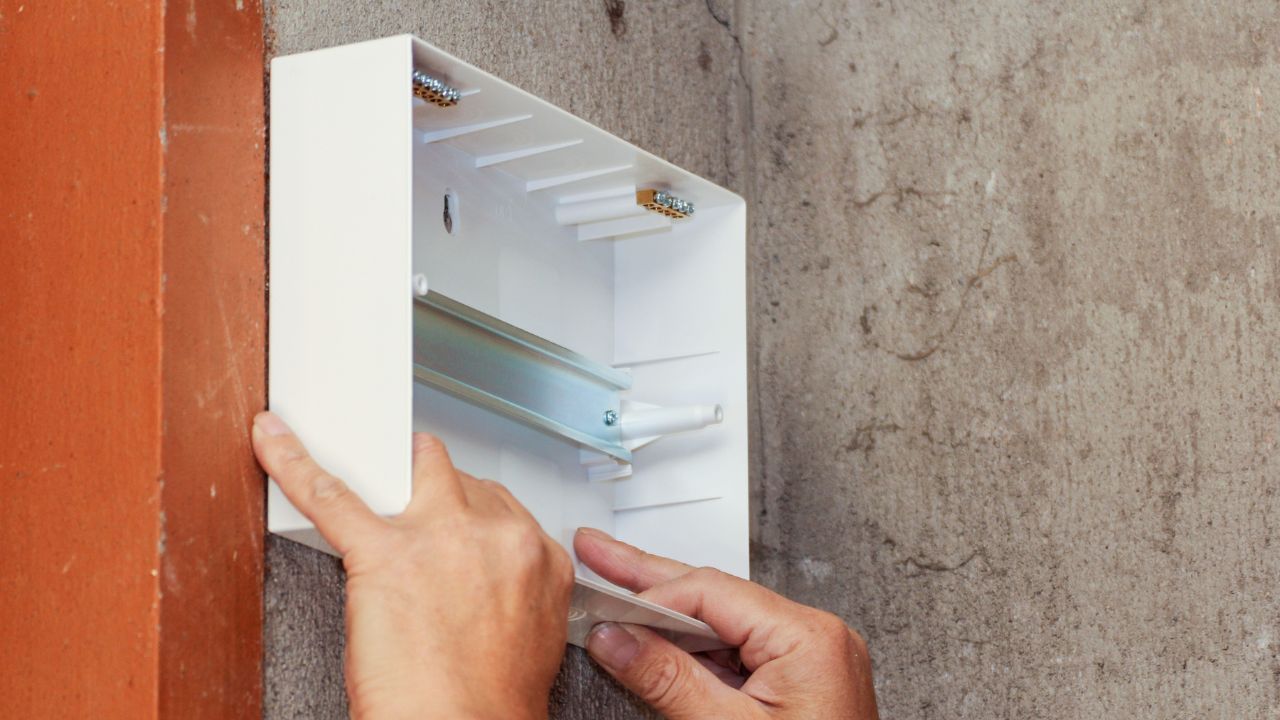
ジャンクションボックスが屋内用か屋外用かを考慮し、プラスチック製か金属製かを選択する必要があります。屋外環境では、耐候性のあるものを設置する必要があります。 防水 ジャンクションボックス。さらに、ジャンクションボックスの選択は、使用するケーブルの種類に合わせる必要があります。例えば、NMケーブルを使用する場合はプラスチック製のジャンクションボックスを、BXケーブルを使用する場合は金属製のジャンクションボックスを選択します。.
ジャンクションボックスは、すべてのケーブルを収容できるように大きめに作られています。導体の充填容量は、その体積(立方インチ)と密接に関係しています。ジャンクションボックスに収まるケーブルと機器を計算して、適切なサイズを決定してください。導体の充填に関するNEC(米国電気工事規程)は以下のとおりです。
| 電線ゲージ(AWG) | 導体1本あたりの体積(立方インチ) |
| 18 | 1.5立方インチ |
| 16 | 1.75立方インチ |
| 14 | 2.0立方インチ |
| 12 | 2.25立方インチ |
| 10 | 2.5立方インチ |
| 8 | 3.0立方インチ |
| 6 | 5.0立方インチ |
ジャンクションボックスの位置
設置前に、配電盤内の回路の位置を確認し、該当する回路の電源を切る必要があります。正確な位置が特定できない場合は、主ブレーカーをオフにしてください。電圧テスターを使用して、回路の電源が完全に切れていることを確認してください。次に、ジャンクションボックスを設置する場所が容易にアクセスできる場所であることを確認してください。.
接続箱は、石膏ボードなどの裏側に埋め込まないでください。周囲に障害物がないことを確認し、配線作業のための十分なスペースを確保する必要があります。これは将来のメンテナンスにも役立ち、安全上のリスクを軽減することにもつながります。.
天井に取り付けるジャンクションボックスは、取り外し可能なカバープレートを備えている必要があります。ジャンクションボックスの設置場所は、防水仕様のボックスを使用しない限り、湿気の多い場所を避けてください。壁に取り付ける場合は、しっかりと固定できるよう、間柱の位置も確認してください。.
最も重要なことは、設置前にジャンクションボックスにすべての配線と機器を収容するのに十分なスペースがあることを確認することです。.
ボックスを取り付ける
使用する場合は 金属製接続箱, ドライバーまたはペンチを使用して、目的の配線穴の金属ディスク(ノックアウト)を押し出します。配線設置計画を確認し、設置場所をマークします。新しいジャンクションボックスのためのスペースを確保するために、回路線を既存の接続部から分離します。.
石膏ボードに取り付ける場合は、ボックスの輪郭をマークして切り抜く必要があります。石膏ボードへの取り付けには、アンカーを使用して固定してください。または、ネジとブラケットを使用して、ボックスを壁の間柱やその他の構造物に固定してください。ジャンクションボックスの前面は壁面と面一になるように設置してください。.
ケーブルクランプまたは電線管継手を取り付ける
ケーブルクランプまたはコンジットコネクタをボックスに挿入し、ケーブルが動かないようにしっかりと締め付けます。通常、ケーブルクランプはプラスチック製のジャンクションボックスに付属しています。金属製のジャンクションボックスには、ロックナット式のクランプを取り付ける必要がある場合があります。次に、ねじ山のある端を穴に通し、ワイヤナットでボックス内部に固定します。締め付けすぎると絶縁層を損傷する可能性があるため、注意してください。.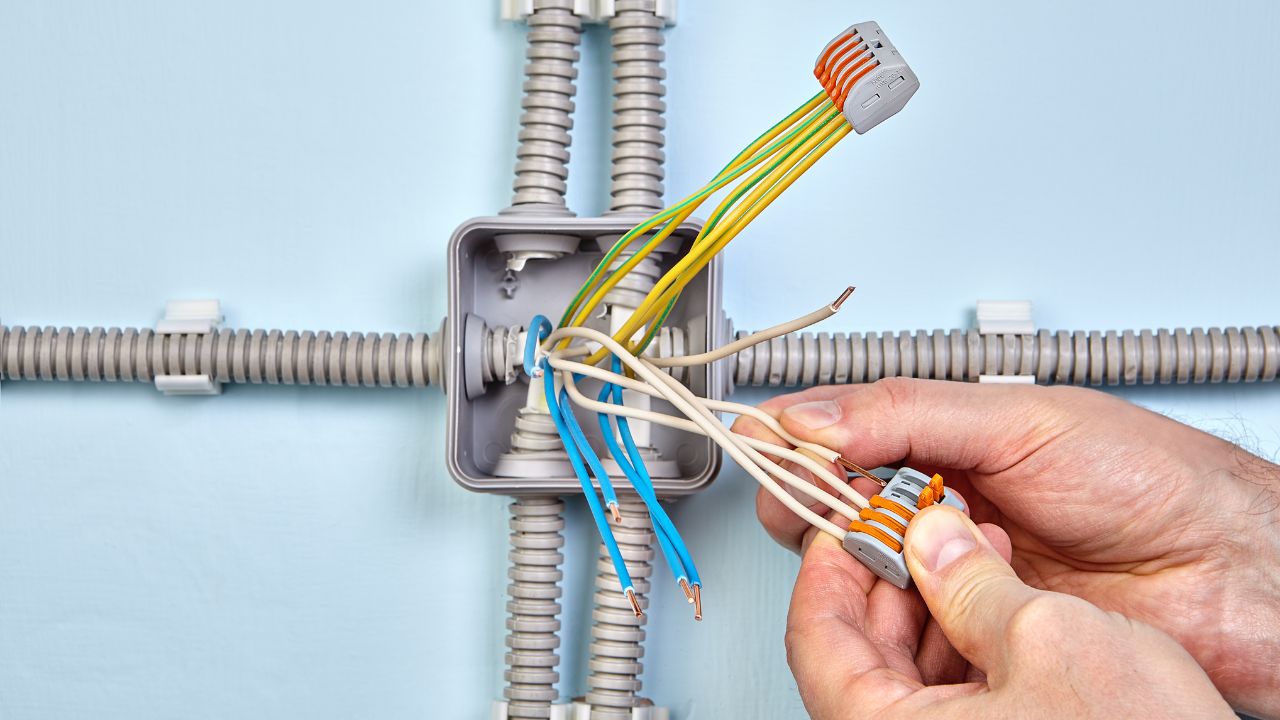
電気ケーブルの被覆を剥がして固定する
ケーブルクランプまたはコンジットコネクタを取り付け、ケーブルが動かないようにしっかりと締め付けてください。通常、ケーブルクランプはプラスチック製のジャンクションボックスに付属しています。金属製のジャンクションボックスには、ロックナット式のクランプを取り付ける必要がある場合があります。次に、ねじ山のある端を穴に通し、ワイヤナットでボックス内部に固定します。締め付けすぎると絶縁層を損傷する可能性があるため、注意してください。.
ワイヤーストリッパーを使用して、ケーブルの被覆を約18~20mm剥がしてください。被覆を剥がす際は、銅導体を損傷しないように注意してください。接続する前に、各導体が損傷していないことを確認し、曲がった端をまっすぐにしてください。.
配線を接続する
接地線(通常は緑色の絶縁線)を接続する必要があります。金属製のボックスを使用する場合は、接地線接続部に6インチ(約15cm)のピグテールを追加する必要があります。その後、それをボックスの接地ネジに取り付けてください。.
次に、電工ペンチを使って、黒線(活線)、白線(中性線)、赤線(活線)をそれぞれ別々に接続します。各ペアの電線にはワイヤコネクタ(ワイヤナット)が必要です。接続が完了したら、接続した電線を軽く引っ張って、しっかりと接続されていることを確認してください。.
ワイヤーを整理して箱の中に折り込む
ケーブルを丁寧に折り曲げ、過度な曲げや力を加えないように注意しながらボックスに収納してください。次に、アース線を背面に配置します。最後に、コネクタの外側に銅線が露出していないか注意深く確認してください。最も重要なのは、ボックスを詰め込みすぎず、定格容量を超えないようにすることです。.
カバーを取り付けます
カバープレートをボックスに合わせてネジでしっかりと固定します。カバーが平らでしっかりと取り付けられていることを確認してください。取り付け後、ブレーカーをオンにして電圧テスターで回路をテストします。接続されている機器が正常に動作しているか確認してください。異常な発熱、異音、または異臭がある場合は、すぐに電源を切り、接続を再確認してください。正常に動作すれば、ジャンクションボックスの取り付けは完了です。.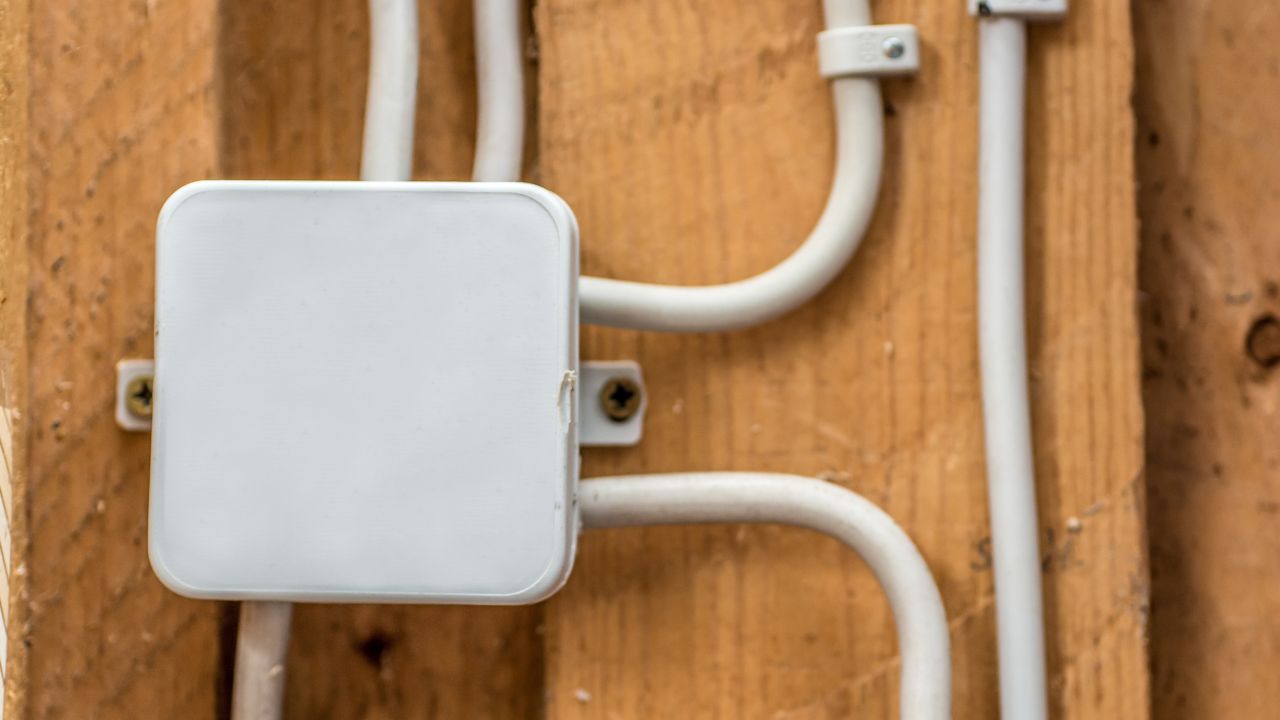
避けるべきよくある間違い
ジャンクションボックスの過剰充填
小型の接続箱を使用すると、熱がこもりやすくなります。また、電線同士の摩擦によって絶縁層が損傷する可能性があり、火災リスクが確実に高まります。さらに、これはNEC(米国電気工事規程)で規定されている箱の充填制限にも違反します。.
枠にとらわれずに接合する
配線接続は接続箱の外側で行ってください。露出した接続箇所は火災や感電事故の原因となる可能性があります。すべての接点は、承認された接続箱内に完全に収容し、カバーを取り付ける必要があります。.
互換性のないワイヤーゲージを混ぜる
負荷分布が不均一になると過熱の原因となる可能性があります。そのため、電線のサイズが回路の要件と遮断器の定格値を満たしていることを確認する必要があります。.
間違ったタイプの接続箱を使用する
例えば、屋内用接続箱を屋外環境で使用したり、金属製接続箱を使用すべき箇所にプラスチック製接続箱を使用したりといった事例が見られます。これらの事例はいずれも、接続箱内部の結露、内部部品の腐食、そして機械的な故障を引き起こす可能性があります。.
よくある質問
ジャンクションボックスは自分で取り付けられますか?
基本的な回路知識があれば、設置回路は簡単です。ジャンクションボックスはご自身で設置できます。緑色の配線や高電圧回路を設置する場合は、専門の電気技師に依頼することをお勧めします。.
金属製の接続箱はどのように接地すればよいですか?
緑色の接地ネジをねじ穴に挿入し、接地線をネジに時計回りに巻き付けます。最後に、ネジを締めます。ボックス内部では、入力/出力の接地線を接続する必要があります。接地ピグテールをボックスに接続し、コネクタでねじって固定します。.
ジャンクションボックスは屋外に設置できますか?
はい、ただし、適切なジャンクションボックスの種類を選択し、正しく設置する必要があります。屋外グレードと表示された耐候性ジャンクションボックスを選択できます。 ネマ4 またはNEMA 4X規格に準拠してください。屋外用ジャンクションボックスにはガスケットカバーを取り付け、適切なシーリング金具を使用する必要があります。屋外用ジャンクションボックスは、水の蓄積を防ぐため、地面に直接触れないように壁や柱に取り付けてください。.
最後に
KDMは、高品質なジャンクションボックスを提供することに専念しているメーカーです。当社のジャンクションボックスは、お客様のニーズに合わせて様々なIP規格およびNEMA規格に対応しています。カスタマイズのご要望がある場合は、ワンストップのカスタマイズサービスも提供しております。 お問い合わせ お客様に最適なソリューションをご提供いたします。.