

Different terminal blocks require different wiring methods. Correctly wiring terminal blocks is a basic skill in electrical work. A firm, safe and reliable connection is the foundation for the stable and safe operation of equipment. This article mainly explains three types of terminal blocks: screw terminals, spring-clamp terminals, and pluggable terminals. If you are a factory equipment maintenance technician or an electrical engineer, this article can serve as a valuable reference for you.
What are terminal blocks in electrical?
Terminal blocks can also be called terminal strips. It is a modular and standardized insulated electrical connector. Its basic structure is that multiple insulated terminals are installed side by side on an insulated base, thus forming an integrated platform for circuit connection.
Terminal blocks can provide more reliable and more secure electrical connections. The insulation structure can also prevent short circuits in wires.Standard tightening reduces the risk of wire loosening due to vibration and pulling.
Terminal block connectors, through safe and orderly control wiring, can simplify the installation and maintenance of wires, and can achieve flexible signal distribution, circuit isolation, and interface conversion to adapt to different wires.
Types of Terminal Block
Screw Terminals
Installation Method: The screw terminal block primarily relies on downward pressure applied by the screw to clamp the wire firmly within the groove and pressure plate of the metal conductor.
Keuntungan: It can provide a highly secure fit and withstand significant current and vibrations Besides, it supports a wide range of wire types and is cost-effective.
Application Scope: This type of terminal is the most versatile and widely used, particularly suitable for high-current applications, main power connections, or industrial environments.
Spring-clamp Terminals
Installation Method: Use the spring force to clamp the wire. You need to use a screwdriver to press the operating lever to open the spring, insert the wire and then release it to clamp it tightly.
Keuntungan: Fast wiring speed and excellent anti-vibration performance.
Application Scope: In situations where rapid installation is required and there is vibration, such as rail transit and mechanical equipment.
Pluggable Terminals
Installation Method: Insert the wire with its rigid metal pin directly into the terminal hole, and the internal mechanism will lock it in place. To remove the wire from the block, use a dedicated tool to press the release mechanism and pull the wire out.
Keuntungan:It has high insulation safety and facilitates multi-circuit power distribution.
Application Scope:Power input distribution, fuse holder, relay socket.
What should you prepare to wire a terminal block?
Step1: Gather the Tool
You need to prepare various sizes of slotted or phillips screwdrivers. Additionally, you need to guarantee that the screwdriver tip must be perfectly matched with the terminal screw slot.
Furthermore, you also need to choose a professional wire stripper that is adjustable and comes with notches for different wire gauges. You need to make sure that the blade of the wire stripper is sharp enough to make a clean cut through the insulation. Please remember that you cannot use ordinary pliers as a substitute.
In addition to the above tools, if applicable, you will also need to prepare a crimping plier with a hexagonal or full-size crimping die that exactly matches the terminal size. This cannot be replaced by ordinary pliers either. Similarly, you can decide whether to prepare auxiliary tools such as pointed-nose pliers and diagonal pliers based on your electrical terminal block.
Step2: Prepare the Wire
Preparing the proper wire is the key to achieving a successful connection. What you need to pay attention to is that the cross-sectional area of the wire should be within the rated range of the terminal block and must comply with the required insulation class. Most importantly, you need to select the appropriate wire type according to the terminal specifications.
Based on the routing path, you need to use diagonal pliers to cut the cable to the appropriate length. The wires need to leave sufficient slack to facilitate subsequent maintenance or bending inside the terminals.
Next, you should carefully strip the wire insulation. The stripping length needs to match the terminal block requirements. You need to make sure that all the wires fit properly into the clamping mechanism inside the terminal block. The insulating layer or exposed wires must not extend beyond the terminal block.
Step3: Choose the Right Terminal Block and Wire
Consider the voltage and current levels of your circuit and select the appropriate size of terminal blocks and wire diameters. As mentioned above, the wire diameter needs to be compatible with the terminal block. Moreover, you also need to consider the usage environment of the terminal block, such as the humidity and temperature of the environment.
Before connecting the wires, you also need to prepare and check your terminal block. You need to use different methods for different terminal block connectors.
Screw Terminals: Use a suitable screwdriver to unscrew all terminals to be wired. Check whether the screws are intact.You also need to observe whether the metal conductor part of the terminal has oxidation, dust, etc.
Spring-Clamp Terminals: You can test whether the spring mechanism of the terminal block can be opened smoothly. Confirm whether the wire is a single-strand hard wire or a multi-strand wire with compliant cold-pressed ends, and confirm that the wire diameter complies with the end specifications.
Pluggable Terminals: Make sure your end is compatible with the release mechanism. You can use a dedicated tool to operate once without wiring to learn how to unlock. And confirm the depth of the wire insertion.
Step4: Ensure Power is Disconnected
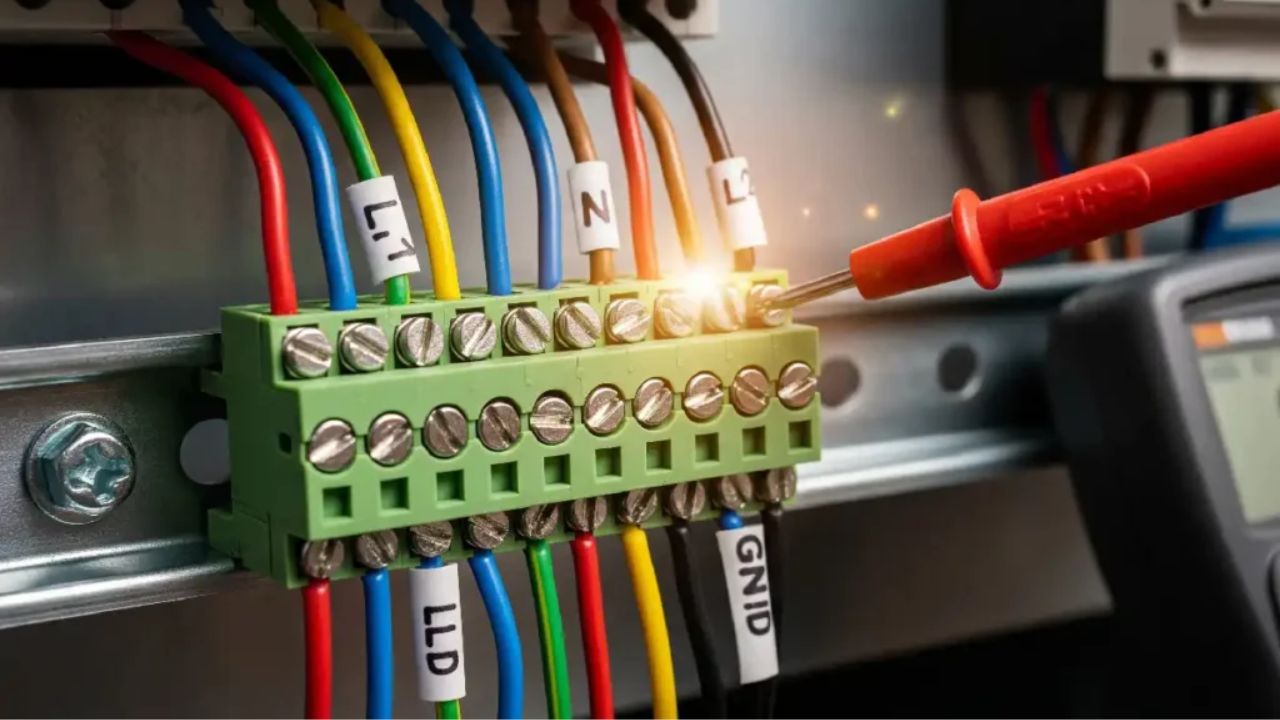
Power off is the first step to ensure the safety of wiring. Turn off the upper-level power supply or circuit breaker. For industrial equipment, you can lock the power switch and hang a warning sign after cutting off the power supply. After the power is cut off, it is still necessary to use a multimeter to test at multiple points on the terminal block to double-confirm that the circuit has completely lost power.
How do you connect wires to the terminal block?
Before wiring, in addition to preparing the tools, you also need to make protective preparations. It is necessary to wear safety glasses and insulating gloves.
Step1: Mount the Terminal Block to Board
No matter which type of terminal block you use, you need to firmly install the terminal block itself on the rel DIN or control panel before wiring. The installed terminal block can prevent movement or detachment during the wiring process, guaranteeing that the connection is undamaged and firm.
Step2: Connect Terminal Blocks with Wires
For screw terminal blocks, insert the processed wire ends straight along the direction of the terminal holes into the bottom of the segment metal cavity. If it is a bare wire, it can be observed that the bare wire is in front of or on the side of the screw press block. Do not press the insulation part into the clamping area.
After that, you need to use a screwdriver to tighten the screws until you feel pressure on the wire, and make sure that the pressure on different screws on the terminal is uniform. Twist the wire until it is firmly fixed. You can gently pull it to check if it is firmly fixed. Note that over-tightening is prohibited, which may cause the copper wire to be cut or the plastic terminal row base to crack.
Untuk spring-clamp terminals, you need to use a screwdriver of the appropriate size and insert it straight into the operation hole. keep a steady pressure until a click is heard, indicating that the spring clamp has been opened.
At this stage, you need to keep the screwdriver stable and still. Then insert the wire straight along the socket to the bottom until it encounters resistance and cannot move forward.Slowly and vertically pull out the screwdriver, and the wire will be automatically locked. At this point, you can gently pull the wire to confirm whether it has been firmly clamped and cannot be pulled out.
Untuk pluggable terminals, you need to align the wire with the dedicated needle-shaped terminals with the socket and push it in smoothly and linearly. If you hear a click, the end has already engaged in place with the lock. Then a powerful pull-out test can be conducted to make sure the connection is correct and will not come off due to tensile force.
If the operation is improper and the wire needs to be pulled out, you should use a special tool to insert into the small release hole and press it all the way down. Then, gently pull it out with the other hand.
Step3:Attach Other Connector to Same Terminal
If you need to handle parallel connections or branch out from the same terminal block point, you must guarantee the reliability of the electrical connection and the mechanical firmness to eliminate potential safety hazards.
It is strictly prohibited to directly twist multiple wires together and press them tightly under the same terminal. This will lead to uneven pressure, insecure connections and overheating, which is the most serious safety hazard.
In this case, you can use distribution terminal blocks or special connectors, or insulation-piercing connectors or wiring terminals.Whichever method you use, you must guarantee that the current load is not exceeded and that each connection point is securely connected and not loose.
Step4: Check and Complete the Circuit
No matter what kind of terminal block you use, a series of general checks and tests still need to be carried out after the completed connection.
First, a visual inspection is required to check if there are any copper wires scattered outside, whether the insulating skin has been pressed into the clamping area, and whether the screws are intact. Additionally, you can gently tug on wire to make sure it is firm and shows no sign of loosening.
Next, you need to conduct an electrical test on it.Use the multimeter for the first time as you need to test whether the connection is live. Besides, when the power is off, you test the insulation resistance between different circuits and between circuits and the ground wire.
Then, you can use nylon ties to trap wires in the same path into bundles. The wire harness needs to have a natural arc and be fixed on the wire slot or the strip seat. For the convenience of subsequent maintenance and management, a uniform position label can be affixed to the terminal block.
Finally, after clearing out all the debris, you can power on and observe whether the equipment is operating normally.
Wire Precautions
Before operation, the power supply must be cut off. Do not operate with power on. After cutting, inspection is required as a double guarantee.
Wear insulating gloves and goggles, take good protective measures and guarantee personal safety.
After stripping, it is necessary to check for any broken strands, burrs or oxidation.
When connecting the power supply, it is the best practice to first put on the PVC threading pipe and then connect the wires.
When bundling wire harnesses, right-angle bending is strictly prohibited to prevent long-term stress damage to the wires.
After the equipment has been running for more than 30 minutes, check whether the connection points have local high temperatures that are different from others. Local overheating is a major signal of hidden dangers.
Tanya Jawab Umum
Are There Any Specifications for Screwdrivers Used to Tighten Terminal Screws?
The screwdriver tip must fit the screw slot completely. Too large or too small can cause the nut to break. It is recommended that you use an industrial-grade screwdriver. For precision or fragile screws, using a torque screwdriver is the best choice.
What Are the Consequences If the Wire Is Stripped Too Short or Too Long?
Improper stripping length is one of the causes of connection failures and potential safety hazards. Too short stripping can lead to poor contact, which may cause overheating, intermittent signal or complete power failure. Excessive stripping of wires can cause short circuits in the wires, and even lead to fires or click dangers.
Can Stranded Wire Be Inserted Directly Without Any Treatment?
In most cases, it is not possible, especially for the spring clamp terminal. Wiring in this way may cause poor contact, overheating or become a fault point. The Stranded wire needs to be crimped through crimp terminals before being inserted into the terminals.
What Could Be the Possible Reasons If the Circuit Is Not Conducting After Wiring?
This issue may arise due to the following reasons. There could be problems with the power supply and circuitry. The most common cause is likely issues with the wires and connection points. The terminal block may also have quality defects or internal damage. You can start by checking these areas.
How Can Wiring Work Be Made More Professional And Convenient for Future Maintenance?
Every wire marker must have a unique and permanent label. Wires should be neatly organized and routed by zones. Leave slack in the cable at both ends or equipment entry points for future modifications. These are all practical methods.
Can Multiple Wires Be Connected to the Same Terminal?
In most cases, it is prohibited to insert multiple wires into the same terminal. However, you may opt for professional components to achieve branched connections, such as distribution terminal blocks, external wiring terminals, or prefabricated jumper bars.
Final Thought
KDM can provide you with high-quality and highly consistent terminal blocks, guaranteeing your connection work proceeds smoothly. We guarantee the quality of your products from raw materials and provide you with flexible customized production solutions. No matter what customization inspiration you have, we can respond quickly and help you turn it into reality. KDM, your ideal custom electrical enclosures manufacturer.